·
Drawing
and Editing Walls
Up to now we have looked at drawing walls using 2D
shapes (e.g Double Line Polygon Tool or an Off-Set Floor Area as in Session 2).
Vectorworks however has a set of advanced Tools
to draw Walls.
The Building Shell (Green Roofed building Icon) is found in the Tool Sets Palette and contains all of the tools needed to construct and edit walls in Vectorworks.
Straight Wall Tool:
The Building Shell (Green Roofed building Icon) is found in the Tool Sets Palette and contains all of the tools needed to construct and edit walls in Vectorworks.
Straight Wall Tool:
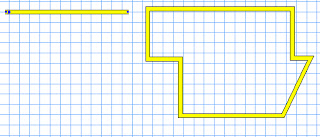
This tool works by clicking and moving the mouse to determine the length and angle of the wall.
- To draw a single wall, click, drag and then double
click to finish.
- You may draw multiple walls at one time, simply
click once and then continue to draw a second wall length. Double-Click as
normal to finish. They will all be selected once you have finished drawing
them, this makes it easy to give them heights and attributes quickly.

The lengths of walls can be adjusted in two ways:
- manually by dragging one end of the wall to a new position. Take care to select the correct cursor (double-headed arrow, angled cursor).
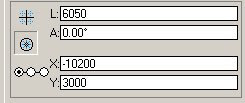
- or in the Obj Info. Palette. Adjust the L value, found under the polar co-ordinates settings. (Note that we can also change the angle of the wall here as well).

We can also Re-position both the end and centre points
of a wall on the grid using the x/y settings in
the Object Info. Palette. Make sure that you select the appropriate point on
the Box position Indicator.
Saying this though, it is always better to have guide lines to use when drawing walls!!!
Saying this though, it is always better to have guide lines to use when drawing walls!!!
The Object info Palette also contains controls for these other settings:
- +Z : Sets the overall height of the wall.
- Bot Z : Sets the height that the wall starts at (Can be both positive and negative).
- Thick : Sets the thickness of the wall (If changed the wall will alter from its center-line).
- Caps : Draw lines to 'cap' the start and end of a wall. This is for 2D work only, wall ends will always be solid in 3D.
- Type: Set the Caps to be either Round or Flat.
This tool has many modes and requires a bit of practice to understand but acts just like the straight wall tool in many respects.
Wall Join Tool:

New walls can be ‘snapped’ into existing ones at any angle and also at corner points. However for more complex wall operations we use the Wall Join Tool.
There are five modes to this tool and each one corresponds to a particular situation, use the diagrams as clues. They all work by clicking on one wall and then drawing a line to the wall to join to. It makes a difference which wall is selected first so if the result is not what you expected try again in another order.
Fillet Tool (Basic Palette):


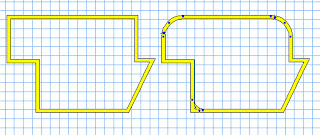
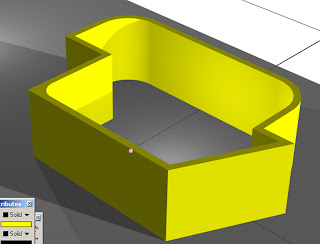
Use the fillet tool to produce rounded corners to two walls that meet each other. Select the Fillet mode and Set the Fillet Preferences in the mode bar. In top view click on one wall and then on the second.
Try out the three settings for different results. The Fillet can be either 'external' or 'internal'.
Individual and multiple walls can be picked up and moved and you will find that it is often useful to nudge them into place by holding down shift and using the arrow keys.
Take care when editing walls, to lengthen, rotate and move walls requires different cursors. Get to know them and have patience at first when trying to find a particular one!
No comments:
Post a Comment